SY Practical No. 10 Design a Quiz for Given User Interface Using Figma
Practical No. 10
Design a Quiz for Given User Interface Using Figma
1. Start a New Design File
Open Figma.
Click New Design File.
Rename the file as Quiz_UI_Practical_10.
Select Frame Tool (F) from the toolbar.
Choose a Mobile Frame (Android / iPhone size).
Recommended size:
Width: 360 px
Height: 640 px
Create 3 frames side-by-side:
Frame 1 → Low Fidelity
Frame 2 → Mid Fidelity
Frame 3 → High Fidelity
Rename frames from the Layers panel.
Part A — Low Fidelity Wireframe (Basic Structure)


Low fidelity shows layout only without colors or styling.
Step-by-Step
Select Frame 1 (Low Fidelity).
Create Header
Use Rectangle Tool (R).
Draw a rectangle at top.
Add text:
QUIZ USING FIGMA
Add Score Section
Insert text:Total Score: 20 Your Score: 0Create Question Card
Draw a rectangle placeholder.Inside add text:
Q1. What is 2 + 2?Create Options
Add 4 small circles or boxes.Example:
A  3
B  4
C  5
D  6
Duplicate Question Block
Press CTRL + D three times to create:
Q1   Q2
Q3   Q4
Create Buttons
At bottom draw two rectangles:
Button 1
Try AgainButton 2
ResultDo NOT add colors or images in this stage.
Low fidelity only shows layout planning.
Part B — Mid Fidelity Wireframe (Structured UI)
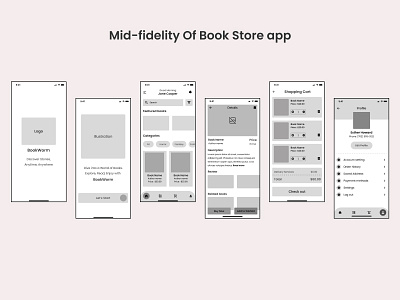

Mid fidelity includes spacing, alignment and readable layout.
Steps
Copy Low Fidelity Frame
Paste into Frame 2.Improve Layout
Use Auto Layout.Select question cards
Press:Shift + ADesign Question Cards
Set properties:
Width: 160 px
Height: 120 px
Corner Radius: 10 pxArrange Cards
Layout example:
Q1 Q2 Q3 Q4Improve Typography
Header:
Font Size: 18
Font Weight: Bold
Question text:
Font Size: 14Add Radio Buttons
For options create circles + text.
Example:
○ 3
○ 4
○ 5
○ 6
Align everything using:
Align Center
Distribute Spacing
This stage should look like a structured application UI.
Part C — High Fidelity Wireframe (Final Design)
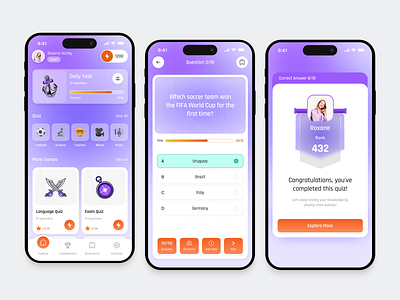


High fidelity represents the final visual design.
Steps
Copy Mid Fidelity Frame
Paste into Frame 3.Add Colors
Header:
Gradient Blue
#2FB8C6 → #1A7F8A
Cards:
Light Gray #F3F3F3
Buttons:
Try Again → Teal
Result → Dark Teal
Style Question Cards
Properties:
Corner Radius: 12
Shadow: 0 4 10 rgba(0,0,0,0.1)
Add Option Buttons
Make circular buttons.
Example style:
Fill: #2FB8C6
Text Color: White
Improve Buttons
Try Again
Width: 120
Height: 40
Radius: 10
Color: #2FB8C6
Result
Width: 120
Height: 40
Color: #1F6D74
Add Padding
Spacing between cards:
16 px
Part D — Create Prototype Navigation
Click Prototype Tab (right panel).
Select Try Again Button
Set interaction:
On Click
→ Navigate to same frame
Select Result Button
Create a new frame:
Result Screen
Text example:
Your Score: 15 / 20
Prototype setting:
On Click → Navigate to Result Screen
Click Present (Play Button) to test.
Final Layer Structure
Quiz_UI_Practical_10
│
├── Low Fidelity
│   ├── Header
│   ├── Score Text
│   ├── Question Cards
│   └── Buttons
│
├── Mid Fidelity
│   ├── Header
│   ├── Score Section
│   ├── Card Layout
│   └── Buttons
│
└── High Fidelity
    ├── Header
    ├── Quiz Cards
    ├── Options
    └── Try Again / Result
Expected Output
Your Figma file should contain:
1️⃣ Low Fidelity Wireframe (layout sketch)
2️⃣ Mid Fidelity Wireframe (structured UI)
3️⃣ High Fidelity Wireframe (colored realistic design)
4️⃣ Prototype Navigation
Viva Questions
1. What is wireframing?
Wireframing is a visual blueprint of a user interface that defines layout, structure, and functionality before final design.
2. Types of wireframes?
Low Fidelity
Mid Fidelity
High Fidelity
3. Why wireframing is important?
Improves user experience
Detects design issues early
Saves development time
4. What is prototyping?
Prototyping creates an interactive simulation of the UI for testing user flow..